When it's time to set up your Mosquitto MQTT broker, you've got a few options to get sorted out before you are up and running. The easiest method is to use a pre-configured Docker image. You can also use your system's package manager to install Mosquitto. Or you can build Mosquitto from source, since it's an open-source project.

In this tutorial, find out how to use Docker to get Mosquitto up and running quickly.
You can also find out how to install Mosquitto from the command line, just in case you don't use Docker.
Install Mosquitto MQTT Broker Using Docker
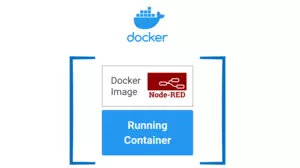
The Eclipse Mosquitto project provides a Docker image that you can use to get Mosquitto up and running quickly. The Docker image is based on Alpine Linux, so it's a small image. You can find the Docker image on Docker Hub.

A typical Docker command line to run Mosquitto looks like this:
Docker run -d --restart unless-stopped -p 1883:1883 -v /var/lib/mosquitto.conf:/mosquitto/config/mosquitto.conf eclipse-mosquitto
This will fire up a Mosquitto broker running on port 1883 with configuration files located in the /var/lib directory. It will also request that Docker keep the container running unless you explicitly stop it.
Install Mosquitto MQTT Broker Using the Command Line on Linux
If you don't use Docker, you can install Mosquitto using your system's package manager. For example, on Ubuntu, you can install Mosquitto using the following command:
sudo apt-get install mosquitto
On Redhat based linux, you can install Mosquitto using the following command:
sudo yum install mosquitto
After Mosquitto is installed, you can configure it by editing the /etc/mosquitto/mosquitto.conf file. You can also use the mosquitto_passwd utility to create a password file for your broker.
One of the advantages of installing Mosquitto this way is that you get immediate access to the other Mosquitto command lines tools, such as mosquitto_sub and mosquitto_pub.
Mosquitto Command Line Tools
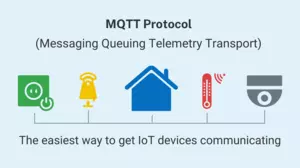
Mosquitto comes with 2 excellent command line tools: mosquitto_sub and mosquitto_pub. These tools allow you to subscribe to and publish messages to topics. They are very useful for testing your MQTT broker and for debugging your MQTT clients.
Once you have installed Mosquitto, you can use these simple command line tools to test your MQTT installation.
For example, to subscribe to all topics on your MQTT broker, you can run the following command:
mosquitto_sub -h localhost -t '#'
To publish a single message to a topic, you can run the following command:
mosquitto_pub -h localhost -t 'test/topic' -m 'Hello World!'
You also might want to make sure that Mosquitto is enabled in your system startup manager. If you use systemd, you can enable Mosquitto using the following command:
sudo systemctl enable mosquitto
Install Mosquitto MQTT Broker on Windows
If you are running your MQTT broker on a windows host, then you need to download and run the Windows installer. You can download the installer from the Mosquitto website.
Keep in mind that it is a bad idea to reboot your MQTT broker often. If you reboot your MQTT broker, then all of your MQTT clients will need to reconnect to the broker. This can cause a lot of problems for your MQTT clients. Some clients handle broker disconnects without a problem, but others can get into a bad state if they lose their connection to the broker.
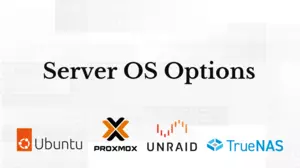
This is why it's a good idea to run your MQTT broker on a dedicated host. If you run your MQTT broker on a host that is also running other home automation services, then when you reboot the host, your MQTT broker goes down for a while. A dedicated home automation server is a good place to install your MQTT broker.
Alternative MQTT Broker: HiveMQ-CE
Bonus section! If you want to try out a different MQTT broker, you can install HiveMQ-CE. HiveMQ-CE is a free and open source MQTT broker that is very similar to Mosquitto. It is also very easy to install and run.
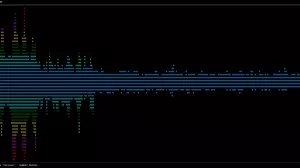
We installed the HiveMQ-CE Docker container on a clean Ubuntu 20.04 machine with the following line:
Docker run --name hivemq-ce -d -p 1883:1883 hivemq/hivemq-ce
Docker pulled the newest image, fired up a container, and started the HiveMQ-CE broker. It was up and running in a few seconds. We were then able to subscribe to topics and publish to those topics without any problems.
As we've mentioned before, Mosquitto and HiveMQ-CE are very similar. It's a good idea to try out both of them to see which one you like better.
After You Install Mosquitto: Use MQTT to Connect Devices
Now that you have a Mosquitto broker up and running, you can start using MQTT to connect your home automation devices. You can also use MQTT to connect your home automation software to other home automation software. For example, you can use MQTT to connect Home Assistant to Node-RED.
You also might be interested in connecting to your MQTT broker from the internet. With a simple port forward you can expose your MQTT broker to the internet. Just be sure that you have, at a minimum, a strong password on your MQTT broker. You can also use a VPN to connect to your MQTT broker from the internet.
As you build out your home automation server, you will find that you lean on MQTT more and more to get data from one place to another. MQTT is a great way to connect your home automation devices and software together.