Let's say that you have a large amount of data on a hard disk, and you want to move it to another location. It could be another hard disk, another computer in the same room, or another computer on the other side of the world. How do you safely move all of that data and know that the data is not corrupted?
We'll examine the best way to move massive amounts of data from one location to another. We'll also examine the best way to verify that the data was moved correctly.
Command Line Tools for Moving Large Amounts of Data
Command line tools are usually the best choice for moving large amounts of data because they tend to be faster and more able to handle errors and flaky network connections.
Be sure to read up about Windows CMD vs Windows Terminal before firing up a CLI and running your backups. You might also want to set up a personal binary directory to put rclone in.
After coving those basics, you are ready move some data. The two most common command line tools for moving large amounts of data are Robocopy on Windows and rsync on Linux. Lately rclone has been gaining popularity as well. We'll talk about all three.
Use Robocopy to Move Large Amounts of Data on Windows
Robocopy is the best tool for moving large amounts of data from one location to another on Windows. It is a command line tool that has been included with Windows for over a decade. Robocopy stands for "Robust File Copy", and it is a very robust file copy tool.
Robocopy is fast and reliable, capable of using multiple processor cores and fully saturating your network and your SATA cables. It behaves move like a one-way sync tool than a traditional file copy tool. This allows it to resume a failed copy at a later date without having to re-copy any files that were already copied.
The only downside to Robocopy is that it does not have any method of verifying that files were copied correctly, such as checksum verification. This means that you have to run a separate program verify that the files were copied correctly. The best tool to verify copied file checksums is rclone.
Robocopy Examples
There are a lot of options in the robocopy manual, and it can be hard to find the exact settings that you want. The command line switches that we are going to use the most with robocopy are:
- /e - Copy subdirectories, including empty ones.
- /r:0 - Number of retries on failed copies.
- /w:0 - Wait time between retries.
- /mt:0 - Number of threads to use.
- /copyall - Copy all file info.
- /log+:log.txt - Log file to write to.
Here are some examples of how to use Robocopy to copy files from one location to another.
Copy all files, including subdirectories, from c:\source to d:\destination, using 8 threads, and logging to log.txt:
robocopy c:\source\ d:\destination\ /e /copyall /w:3 /r:3 /mt:8It's also possible to copy files over a UNC network path, restartable mode, with a logfile, like this:
robocopy c:\source\ \\servername\destination\ /e /copyall /w:3 /r:3 /mt:8 /z /log+:log.txtRobocopy Tips and Tricks
Here are some tips and tricks to help you get the most out of robocopy.
- /z - Copy files in restartable mode.
This is mostly useful when copying large files over a spotty network connection. It allows robocopy to resume a copy at a later date without having to re-copy any files that were already copied. It is usually not necessary when copying files from one hard disk to another, or when copying from one computer to another on the same wired network.
- /mt:%NUMBER_OF_PROCESSORS%
This will use as many threads as you have processor cores. This will copy files as fast as possible, but it will also use a lot of CPU and network resources.
- /eta
Shows the estimated time of arrival (ETA) of the copied files.
Use rclone To Verify That Your Data Was Copied Correctly
After copying files with robocopy, you should verify that the files were copied correctly. The best tool for this is rclone. Rclone is a command line tool that can be used to copy files from one location to another, and it can also be used to verify that files were copied correctly.
You can download rclone from the official site:
If you using a standard Windows desktop PC, then choose the Intel/AMD - 64 Bit version.
Rclone is a single file binary that needs to be copied to a system path on your computer. If you do not already have a Personal Binary Directory you should create one now, and put rclone in it.
Once rclone is in your system path, you can use the following command to create an MD5 hashsum file that can be used to verfiy that files were copied correctly:
rclone hashsum c:\source\ --hash MD5 --output md5sums.txtThis will create a file called md5sums.txt that contains the MD5 hashsums of all of the files in the c:\source directory. You can then copy this file to the destination computer, and use it to verify that the files were copied correctly, like this:
rclone hashsum c:\destination\ --hash MD5 -C md5sums.txtRclone will check all of the MD5 hashes of the files in c:\destination\ and compare them to the hashes in md5sums.txt. If any of the hashes do not match, then rclone will print an error message. If all of the hashes match, then you know that the files were copied correctly.
Use Rsync to Move Large Amounts of Data on Linux and Mac
Rsync is the best tool for moving large amounts of data from one location to another on Linux and Mac. It is a command line tool that is included with Linux and Mac, although the version that ships with Mac is very out of date. Rsync stands for "Remote Sync", and it is a very robust file copy tool.
Much like Robocopy, rsync is fast and reliable, capable of using multiple processor cores and fully saturating your network and your SATA cables. It behaves move like a one-way sync tool than a traditional file copy tool. This allows it to resume a failed copy at a later date without having to re-copy any files that were already copied.
Rsync can use the ssh protocol to copy files over a network connection. If you are going to rsync files to a remote workstation or server using ssh, then first make sure that you have ssh permissions to connect to that computer.
Rsync Examples
The simplest rsync command is:
rsync -avz source destination- -a - Archive mode. This will preserve file permissions, ownership, and timestamps.
- -v - Verbose mode. This will print the names of the files that are being copied.
- -z - Compress file data during the transfer.
A more complex rsync example:
rsync -avzhP --dry-run --exclude-from=exclude.txt source destination- -h - Human readable output. This will print the file sizes in human readable format.
- -P - Show progress during transfer.
- --dry-run - Do a trial run with no changes made.
- --exclude-from=exclude.txt - Exclude files that match the patterns in exclude.txt.
Rsync can also be used to copy files over a network connection using the ssh protocol. Here is an example of how to copy files from one computer to another over a network connection:
rsync -avzhP --dry-run --exclude-from=exclude.txt source user@destination:/home/user/destinationAfter copying files, rsync performs a basic verification that the files were copied correctly. If the data is very important, then you should run a rclone hash verify on the files to make sure that they were copied correctly.
Why You Should Not Use Windows Explorer to Move Large Amounts of Data
Since Windows Explorer is built-in to Windows, you might be tempted to simply drag'n'drop your data from one location to another. For small amounts of data, this is usually a perfectly fine choice. It's a great way to move a few files from one folder to another, or to copy files to a USB stick. You can even use it to move large amounts of data, but it's not the best way to do it.
Using Windows Explorer to move large amounts of data is a bad idea for a few reasons.
- Windows Explorer file copy is notoriously slow. Like, really slow.
- There is no way to recover from a failure. If something goes wrong, you have to start the process over again.
- There is no verification that the files were copied successfully.
- Windows has a habit of asking questions in the middle of a large file copy/move operation and holding up the process.
Using Explorer will sometimes work for moving large amounts of data. It's not the fastest or the most reliable, but it's the easiest because it's already there, installed on your computer.
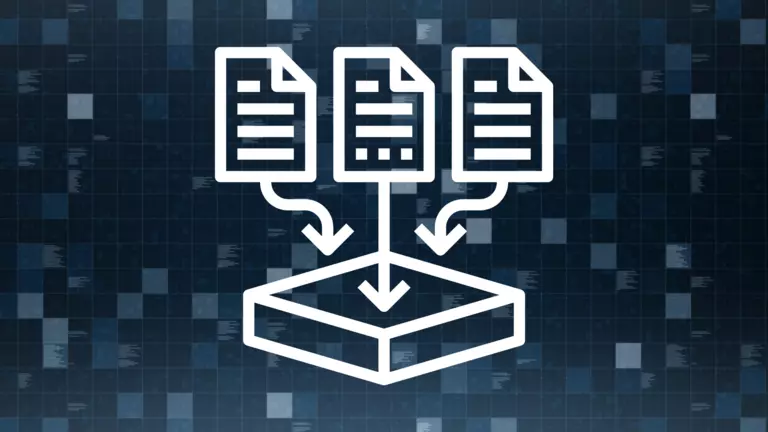
Graphical Tools for Moving Large Amounts of Data
Many people prefer graphical tools, or GUI tools, to command line tools. It you're one of those people, then here's a couple of excellent GUI tools that you can use to move large amounts of data safely, and verify that it was moved correctly.
These tools are usually significantly faster than Windows Explorer, and they usually have some sort of verification that the data was copied correctly. They also usually have a way to resume a copy operation if it fails.
Use TeraCopy to Backup Your Data
TeraCopy is a free tool that you can use to copy large amounts of data. It's a lot faster than Windows Explorer, and it has a lot of features that make it easier to use. It comes in a free version and a premium version.
TeraCopy will perform a copy and verify in one step so that you know that your data was copied correctly.
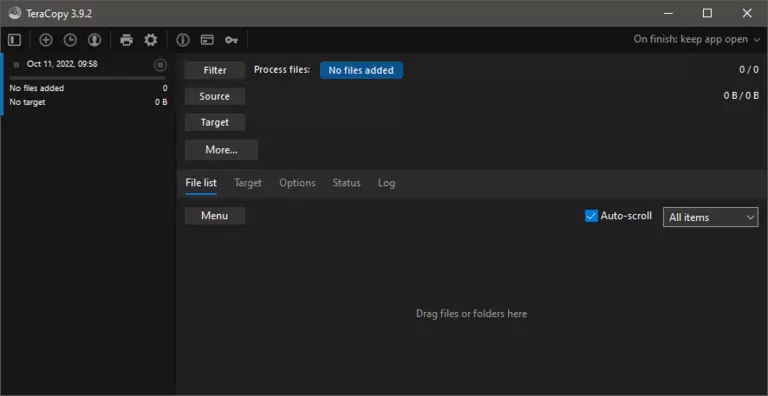
The GUI is easy to understand, and remembers your last few copy operations so that you can repeat them easily. It also has a resume feature that will allow you to resume a copy operation if it fails.
Use FreeFileSync to Backup Your Data
You can also use FreeFileSync to copy large amounts of data. It's an open-source, free tool that is available for Windows, Linux, and Mac. It's a lot faster than Windows Explorer, and it has a lot of features that make it easier to use. You can download FreeFileSync here:
As you can see, FreeFileSync is a bit more complicated than TeraCopy:

FreeFileSync aims to keep files in sync between a source and destination, so it may be better suited for a backup scenario than a one-time copy scenario. It also has a resume feature that will allow you to resume a copy operation if it fails.