AVR is the name of a series of microprocessors from Atmel. Every microprocessor in the series shares the same instruction set and core parts.
As your project needs change, you can choose a different AVR to fit your needs based on how much I/O you need, how many timers you need, memory space requirements, speed, and other features. They come in a variety of package types as well.
The beauty of AVR is that once you know how to deal with one of them, you know how to deal with them all. Another feature of the AVR series chips is that they all have internal oscillators. Unless your design really needs it, you can get away with no crystal on many of your projects.
Programming Languages available on AVR Chips
Most people write source code for their AVR in either assembler, C, or a Basic derivative. Use this table to help you decide which language is best for you. Keep in mind that these are gross over simplifications of the advantages and disadvantages of each language.
| Language | Code Size | Development Time | Execution Speed |
| AVR Assembly | Small | Longest | Fastest |
| C | Small | Medium | Fast |
| Basic | Largest | Medium | Slower |
How To Develop Source Code on the AVR Series
There are lots of different ways to get started writing code on AVR chips. Your development environment will depend on how much you want to spend. First you need to pick the Compiler or Assembler that you will use.
Compiler / Assembler
You need a way to translate the code that you write into a file that can be transferred into the AVR chip. This is either a compiler or an assembler, depending on which language you choose. In general the compiler/assembler is free for AVR. Whether you choose to write in Assembler or C there are free compilers and assemblers available. If you are interested in getting started with writing in C on the AVR, then check our our next guide in this series when you are done with this one. If you choose to use Basic then you can use a free but limited compiler for up to a certain size of program. One of the more popular choices is BASCOM-AVR.
Chip Programmer
After you have compiled your source code, you need to transfer it to the AVR to run. There are many ways to do this, and many different costs available to you.
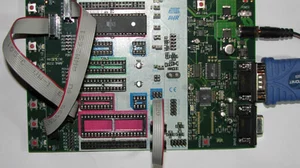
- STK500 - This is really the best way to go if you are just starting out with AVR chips. It costs about $90 and it is well worth it. You can do all of your development on this board. It is the de facto standard for AVR development. You can get them at mouser, amongst other places. If you are not sure how to get started in AVR, get one of these!
- AVRISP mkII In System Programmer - This is an inexpensive product that costs about $30 and allows you to program your AVR in system, assuming you have designed an in system header into your project. Note that the STK500 above does everything this does and more. This programmer is more intended to program an existing product than to program a new chip, but you can quickly breadboard up a circuit to take advantage of the low cost of this ISP programmer.
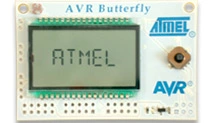
- AVR Butterfly - This little guy is absolutely loaded with features, and costs about $30. You can use it to develop code if you like, or show off your coding skills. It will not program other chips, only the chip that is permanently soldered onto the back, but it is a fun way to experiment with AVR for low cost. It includes an 8 way joystick, LCD panel, lots of memory, a real time clock, plenty of I/O pins and a serial port for programming that is also available to your program. It runs on a coin cell battery.
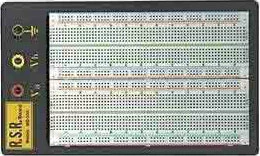
- USBtinyISP - A simple chip programmer that costs $16 in kit form. You will need to provide a solderless breadboard to work in. We do not recommend this method for beginners, but it is a cheap way to get in to AVR on the cheap.
The Different AVR Series Chips
You can see a large breakdown of all of the AVR chips that are available at Atmel's site here. There is a lot of info to digest there, so we'll help break it down for you a little here. The most common AVR series are the tiny series and the mega series. This is where you should focus.
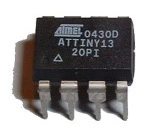
ATtiny13A
This is a little 8 pin device. It is very popular in robotics for driving a single servo motor. It is also useful for small projects requiring very little I/O. These chips cost less than $2.
- 1-Kbyte In System Programmable Flash Memory
- 64 byte EEPROM
- 64 byte SRAM
- 4 channel 10 bit A/D
- 1 Analog comparator
- 5 I/O pins
- 1 Timer/Counter with PWM
- 1 External Interrupt
In our experience, if you can not fit your project in the ATtiny13, then the next logical step up is the ATmega8.
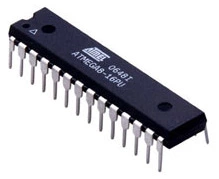
ATmega8
This is a medium sized 28 pin device. It shines as the main controller in many projects. These chips cost less than $4, and they are very feature rich.
- 8K bytes In System Programmable Flash Memory
- 512 byte EEPROM
- 1K byte SRAM
- 6 channel 10 bit A/D
- 1 Analog comparator
- 23 I/O pins
- 3 Timer/Counter, 1 with PWM, 1 16 bit
- 2 External Interrupt
- 1 SPI port
- 1 UART (USART)
- 1 TWI (Two Wire Interface)
In our experience, if you can not fit your project in the ATmega8, then the next logical step up is the ATmega32.
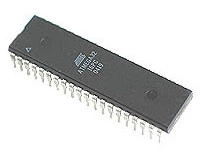
ATmega32
This is a large sized 40 pin device. It shines as the main controller in many projects. These chips cost about $6, and they are amongst the most feature rich chips in the AVR series.
- 32K bytes In System Programmable Flash Memory
- 1024 byte EEPROM
- 2K byte SRAM
- 8 channel 10 bit A/D
- 1 Analog comparator
- 32 I/O pins
- 3 Timer/Counter, 1 with PWM, 1 16 bit
- 2 External Interrupt
- 1 SPI port
- 1 UART (USART)
- 1 TWI (Two Wire Interface)
- 1 JTAG on chip debug system
Our Recommendations For The Beginner
Start out with the STK500 and an ATmega32. This gives you all the I/O and power you could ever need for development.
Later on, if you decide that you are not using all of the power that the mega32 has, you can always retarget your code to a smaller chip like a mega8 or tiny13. All of the code on this site is written and tested on a mega32 running in an STK500. It is simply one of the best development environments for microcontrollers out there today.
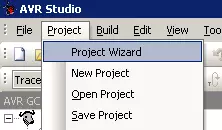
Now you are ready to get setup to write some code. Continue on to learn how to install WinAVR and AVRStudio.