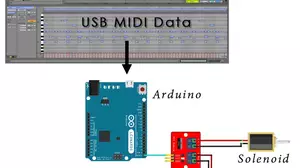
This is the 3rd and final part in a 3 part series about how to control solenoids using Ableton Live and an Arduino. In case you missed them, the first 2 parts are here:
- MIDI Controlled Solenoids with Arduino and Ableton Live – Part 1
- MIDI Controlled Solenoids with Arduino and Ableton Live – Part 2
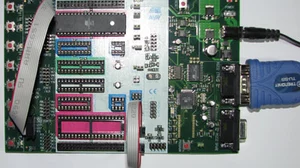
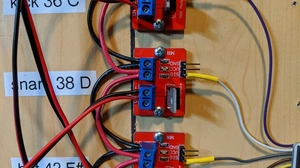
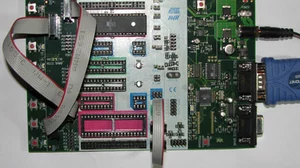
If you've been following along then at this point in time you should have your solenoids, transistors, and Arduino all ready to go.
In this article we cover the Ableton Live part of making your solenoids move. If you don't use Ableton Live for your DAW you can still learn about this final step and then translate it to how your DAW works.
MIDI Data Out of Ableton
The goal here is to get MIDI data out of Ableton and into your Arduino.
To get started the Arduino needs to be setup as a MIDI output device.
Ableton Live MIDI Output Devices
After running the software in the previous article, your Arduino will show up as an available MIDI output device in Ableton live. Just be sure to let your Arduino drivers detect and install.
Pick an available MIDI slot and assign your Arduino in the output column. Also, be sure to enable On under the Track column.
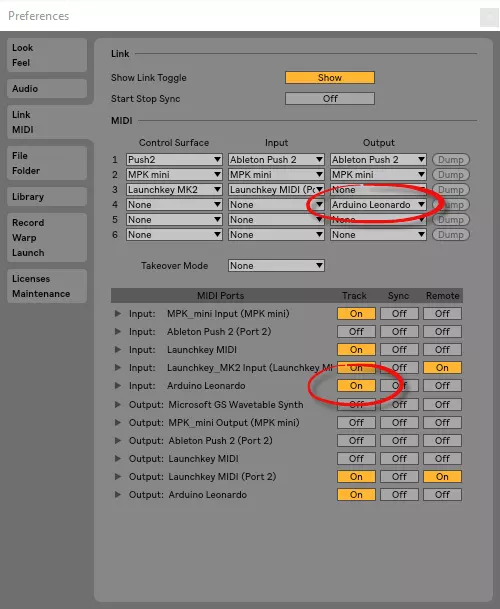
If there are no Arduino devices listed in Ableton MIDI preferences then exit and restart Ableton Live. Also, make sure that you have ran the source code from the previous article at least once.
Add Your Arduino as a MIDI External Device
This step is technically not necessary as you can select the Arduino for output using other methods directly on the track. However, this makes adding MIDI effects before your Arduino much more straightforward.
On the track that you want to generate MIDI events add the MIDI instrument called External Instrument.
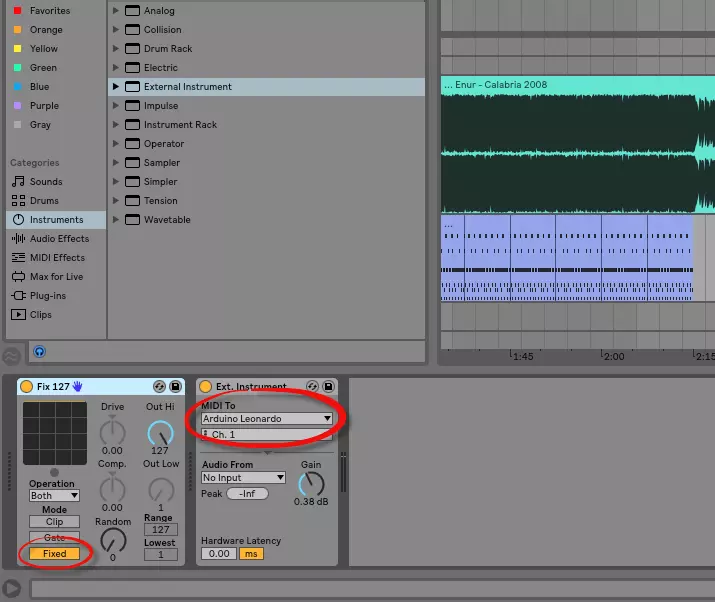
In the screenshot above we've also added a Fix 127 MIDI device. This makes the velocity of all MIDI events a full 127, which is the max MIDI velocity. This is not necessary with the source code we've provided, but it's a cool MIDI effect to know about for future projects.
You can leave the MIDI channel to 1 on the External Instrument device since our code responds to MIDI events on all channels.
Arm Your Track and Play Some Notes
At this point in time you should be able to arm your track and see MIDI notes heading down to your Arduino when you play them.
You can enable the keyboard as a MIDI device and send MIDI data to your Arduino using your computer keyboard. The home row (ASDF) generates note data and the Z and X keys shift the current octave up or down.
Press Z to shift the octave down and then start pressing A to generate a C note. Try pressing Z a few more times until a low C is generated. If everything is set up right then your output transistor attached to pin 0 should blink and your kick solenoid should move.
Once you've gotten this to happen then you have full control over your Arduino and solenoids from Ableton. It's time to write some music.
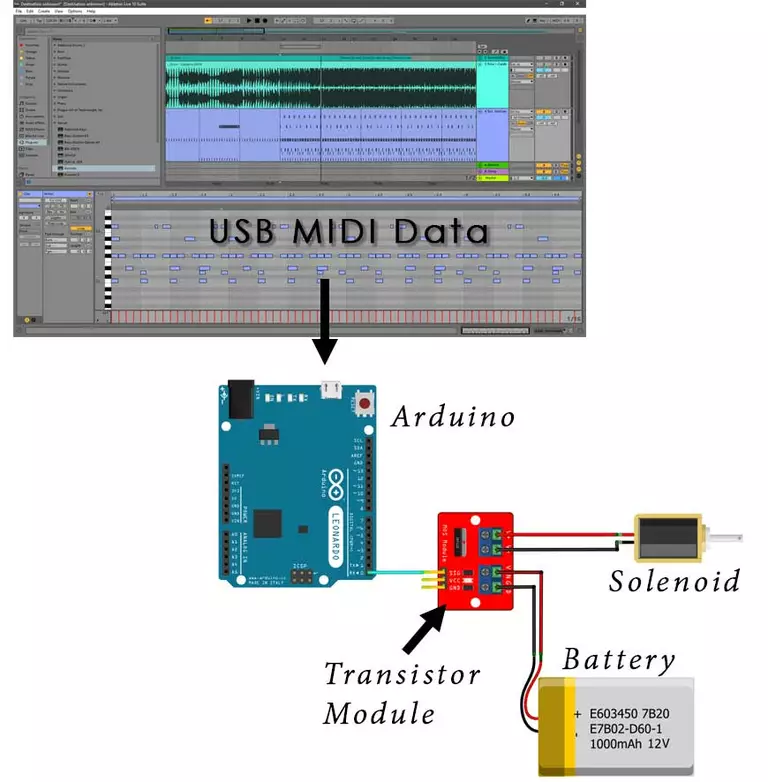
Warp A Track and Write Some Drums
Once you have Ableton controlling your Arduino you are ready to bring in an MP3 or WAV file and write a drum track for it.
When you bring the MP3 file in Ableton will warp it to your current time signature as best as it can. Warping aligns the MP3 file with the beat of your track which allows you to add drums on the beat of the imported track.
Now all you need is a MIDI track to match the song. Here's the MIDI drum data that we used in our demo video:
And once again here's the video from the start of the series that shows what you can do with this setup.
The MIDI drum part only has 6 instruments corresponding to the 6 solenoids. If you don't have 6 solenoids, then use Ableton to merge some of them together. For instance, you can merge 39 (C#) and 49 (D#) if you only have 5 solenoids.
Common Problems
The most common problem when using an Arduino as a MIDI device in Ableton is when you reprogram the Arduino device Ableton can sometimes lose track of it. Usually when this happens it is still in the MIDI preferences dialog but it is in red, indicating that Ableton thinks something else has exclusive access to it.
The only solution here is to exit and restart Ableton. Sometimes a full reboot of your computer is required.
Other MIDI Projects
That wraps up our 3 part series on controlling solenoids from Ableton Live using an Arduino. Do you want to see any other MIDI projects on this site? If so, then let us know in the comments.