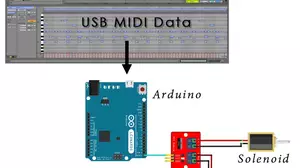
This is part 2 in a 3 part series that shows how to make Ableton Live play music on electric solenoids using an Arduino. If you missed the first article you can find it here:
- MIDI Controlled Solenoids with Arduino and Ableton Live – Part 1
- MIDI Controlled Solenoids with Arduino and Ableton Live – Part 3
This article covers the Arduino software required to listen to MIDI events from Ableton and control solenoids. The complete source code is included at the bottom.
MIDIUSB Library
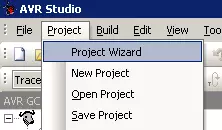
In order to process MIDI on our Arduino we use the MIDIUSB library. You can add it to an Arduino project by choosing Tools->Manage Libraries..., then search for MIDIUSB.

After adding MIDIUSB to your project you can simply use the static object called MidiUSB in your loop (), like this:
void loop() {
    //listen for new MIDI messages
    midiEventPacket_t rx = MidiUSB.read();
    processMidi(rx);
}
We'll do all of our processing in the processMidi () function, which is passed the entire MIDI packet that just arrived.
MIDI Events and Packets
MIDI is an event oriented protocol, which means that in the Arduino we only get a packet to process when there is something to do. Many packets are useless in this application so we can safely ignore them.
The two MIDI events that we are interested in are Note On and Note Off. These events tell us when to move the solenoid forward and when to release it so that it can move back again.
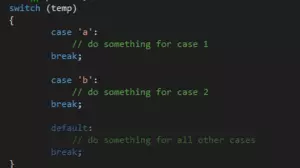
We can detect Note On and Note Off using a switch statement, like this:
void processMidi(midiEventPacket_t rx) {
    switch (rx.header) {
    case 0x0:
        // do nothing
        break;

    // note on
    case 0x9:
        handleNoteOn(rx.byte1 & 0xF, rx.byte2, rx.byte3);
        break;

        // note off
        case 0x8:
        handleNoteOn(rx.byte1 & 0xF, rx.byte2, 0);
        break;
Each MIDI packet can have data bytes with it. In the case of Note On and Note Off, these are the data bytes that we get:
- rx.byte 1 = Channel
- rx.byte2 = Pitch
- rx.byte3 = Velocity
Notice that on both cases we call handleNoteOn. When we receive a Note Off command, we pass a velocity of 0.
Note Off is just Note On with a velocity of 0.
Because of differences in Endianness between PC and MIDI, it is sometimes difficult to determine the exact values of MIDI events to respond to. It may be easiest to use print statements to print the MIDI packet command byte to figure out how to process some events.
MIDI Drum Notes
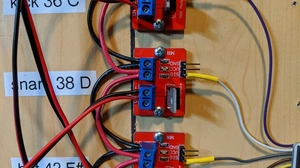
In the MIDI world drums have had a difficult life. They are far from standardized and you never really know if the drum track for one MIDI orchestration will work on another. For this project we decided on the following MIDI drum map:
- Kick Drum = 36 (low C) - This is very standard
- Snare Drum = 38 (low D) - This is also very standard
- Bell = 39 (low D#) - Sometimes flam, sometimes hand clap
- High Hat = 42 (low F#) - Standard for closed hat
- Open Hat = 46 (low A#) = Sometimes open hat sometimes shaker
- Crash = 49 (mid C#) = Pretty standard
We were working with an AKAI MPK mini while designing this and it has a different mapping in Ableton for the drum pads, so we also defined some alternate MIDI notes for each of these drums. Some people may find it useful so we left them in.
MIDI Velocity
MIDI velocity ranges from 0 to 127. A velocity of 0 is note off while a velocity of 127 is full. We found that firing the solenoids at less than full velocity was not satisfying so we clamped anything above 0 to full on.
You can modify this program to respond to velocity by changing the digitalWrite lines to analogWrite. You will need to multiply the velocity by 2 in order to get the solenoids to move at all, and you may need to scale up a little in either Ableton or in software to get the results that you want.
An Arduino is capable of moving the solenoids forward at less than full strength with the analogWrite() function. Just be aware that analogWrite expects a range of values between 0 and 255, while MIDI velocity ranges from 0 to 127. In addition, many solenoids will not move at all with less than 1/2 strength, so it a scaling function may be needed if analogWrite () is used in place of digitalWrite().
Debugging MIDI Data
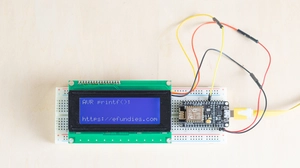
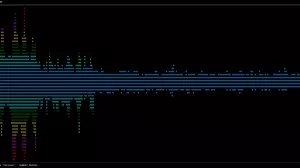
If you open up the Arduino serial port monitor when running you can see the MIDI events that have been processed as you play them in Ableton Live.
This is useful for figuring out which events you want to respond to and which MIDI notes you are sending. We have the serial port running at 115,200 baud.
Getting MIDI events out of Ableton Live and into your Arduino is covered in the 3rd article in this series.
Turn On Solenoids
In the handleNoteOn function all we have to do is respond to which note is being turned on or off and turn the appropriate pin on or off. We can again use a switch statement here, which you can see in the code below.
void handleNoteOn(byte channel, byte pitch, byte velocity) {
// it is possible to use the actual midi velocity here, just be sure to
// double to value because midi is 0-127
// and then change digitalWrite to analogWrite
if(velocity > 0) {
velocity = HIGH;
}
switch (pitch) {
case kickMidi:
case kickMidiAlt:
Serial.print("Kick: ");
digitalWrite(kickPin, velocity);
break;
case snareMidi:
case snareMidiAlt:
Serial.print("Snare: ");
digitalWrite(snarePin, velocity);
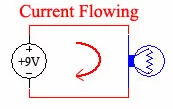
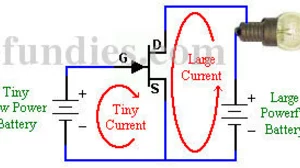
break;In order to turn a solenoid on all we have to do is turn an output pin on. This turns the transistor module on, which connects the solenoid to the battery. When we turn an output pin off the transistor switches off and the solenoid plunger is released. The spring in the solenoid pulls the plunger back to neutral.
Source Code
Here is the complete source code for Arduino to listen to MIDI events and fire solenoids.
Getting MIDI Notes out of Ableton Live
The 3rd article in this series covers how to get MIDI note data out of Ableton Live and into your Arduino. You find the 3rd article here:
By the end of the 3rd article you will have Ableton Live moving your solenoids either through a MIDI track or responding to keypresses from your MIDI input keyboard.