When experimenting with electronics, it is usually best to practice in what is called a Solderless Breadboard.
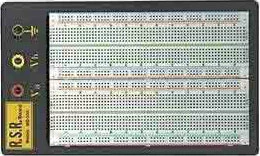
There are many on the market. You can find them at Radio Shack, as well as many Internet sites. One of our favorite solderless breadboards comes from Electronix Express. The last time we checked it was available here. They are made by RSR and cost about $15. Here is what they look like.

I know that the picture isn't very sharp, so here's a picture of a different one zoomed in so you can see it better.

The letters a, b, c, d along the left and right are simply for your own use. They have no real meaning. The same is true for the numbers 1, 5, 10 along the top and bottom.
The blue line labeled - is supposed to be connected to GND or the negative terminal of your battery. The red line labeled + is supposed to be connected to the positive terminal of your battery. Note that the top blue line and bottom blue line are not connected. Neither are the top and bottom red lines. Most people will jumper red to red and blue to blue with a short piece of wire.
How The Breadboard is Layed Out
The main part of the bread board is a bunch of holes that you are supposed to stick the legs of components such as resistors, capacitors and transistors into. The holes are in vertical groups of 5. All 5 holes in a vertical group are electrically connected to each other. Here is a drawing of what the electrical connections inside a solderless breadboard typically look like.

If you plan on purchasing a breadboard, you should also consider picking up a jumper wire kit. Jumper wire kits are a collection of a few hundred wires that are perfect for using with solderless breadboards. They are precut, stripped and bent to fit the hole patterns in these boards. Again, Electronix Express has a good one for about $5. Last time we checked you could get it here.
Simple Example
Let's look at a simple example of how to use a solderless breadboard to build a circuit.
ÃÂ
A Simple Example 1

A Simple Example 2

The above two examples are electrically identical.
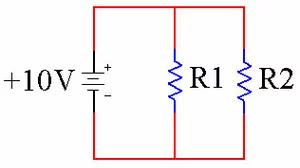
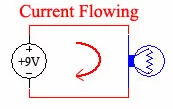
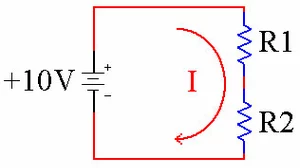
Here we have a 220 ohm resistor, a +9V power source and an LED. First we'll wire it up on the drawing.

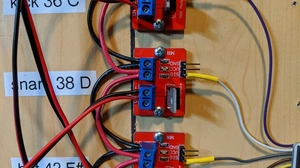
The red and black wires are from a 9V battery clip. You can purchase these at most electronics stores, or clip one off of an old device. The blue wire you will need to come up with as well. If the LED does not light, try turning it around so that it is wired the other way. Remember that LED's are polarized. Here is what this circuit looks like in real life.

In case it is hard to see the connections, here is a close up of the important area.

Now go get yourself a solderless breadboard and some components and start building.
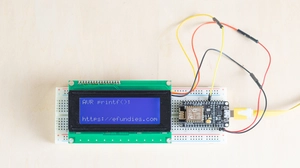
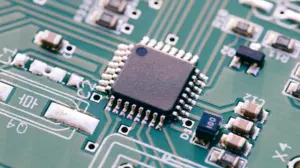
How to Breadboard with Integrated Circuits
One of the great things about solderless breadboards is that they are made to accept Integrated Circuits for prototyping. If you are not sure what integrated circuits are, don't worry about it, we'll cover them later.
See the groove down the middle of the breadboard? That's to separate the top rows of 5 from the bottom rows of 5. Straddle that groove with the integrated circuit as shown below.

How to Make it Permanent
Once you have your circuit layed out the way you like it, you can make it permanent in a protoboard. There are many different protoboards out there in many different sizes. One of our favorites is from www.futurelec.com, and is called the protoboard 777 for $1.50.

The thing we love about this protoboard is that the copper traces on the bottom (in the photo) are very similar to a solderless breadboard. Plus, there are rows of two holes connected all the way around the perimeter of the board.
The way that you use a protoboard is you place the components in the top. The top is the side without copper. Place components one at a time. You can hold them in place with tape, or hot glue. Then flip the board over and solder each component pin in place. Then make connections on either the top or bottom with short wires, solder in place. Here are some examples of what protoboard circuits can look like. These are not particularly good examples, they are just a couple of random examples.


And here is what the bottom can look like. Again, not a particularly good example.

This type of wiring is called point to point wiring. Point to point wiring is generally fast to assemble, but slow to debug and repair. Most people start with point to point wiring, and it is a very common circuit assembly technique.
Conclusion
In this guide we introduced the solderless breadboard and wire kits. If you are interested in learning electronics, these are two of the first things that you should purchase. After you have created a circuit that you want to make permanent, then move it to a protoboard, like the protoboard 777.